By: CS2113-AY1819S1-W12-1 Since: Aug 2018
- 1. Introduction
- 2. Quick Start
- 3. Features
- 3.1. Viewing help :
help/h - 3.2. Adding a person:
add/a - 3.3. Listing all persons :
list/ls - 3.4. Editing a person :
edit/e - 3.5. Locating persons by name:
find/f - 3.6. Deleting a person :
delete/d - 3.7. Selecting a person :
select/s - 3.8. Listing entered commands :
history/hs - 3.9. Undoing previous command :
undo/z - 3.10. Redoing the previously undone command :
redo/y - 3.11. Clearing all entries :
clear/c - 3.12. Searching for person’s photograph
- 3.13. Export contacts displayed:
export - 3.14. Exporting all contacts :
exportall - 3.15. Import contacts:
import - 3.16. Add personal schedule :
schedule/sc - 3.17. Clear personal weekly schedule :
clearSchedule/cs - 3.18. List Common Schedule :
matchSchedule/ms - 3.19. Add To-do task:
todo - 3.20. Finish To-do task:
finishTodo - 3.21. Add Reminder:
reminder - 3.22. Exiting the program :
exit/x - 3.23. Saving the data
- 3.24. Getting Smart Suggestions
- 3.25. Getting Wrong Command Suggestions
- 3.26. Monthly Calendar View
- 3.27. Calendar to view schedule [Coming in V2.0]
- 3.28. Encryption [Coming in V2.0]
- 3.1. Viewing help :
- 4. FAQ
- 5. Command Summary
1. Introduction
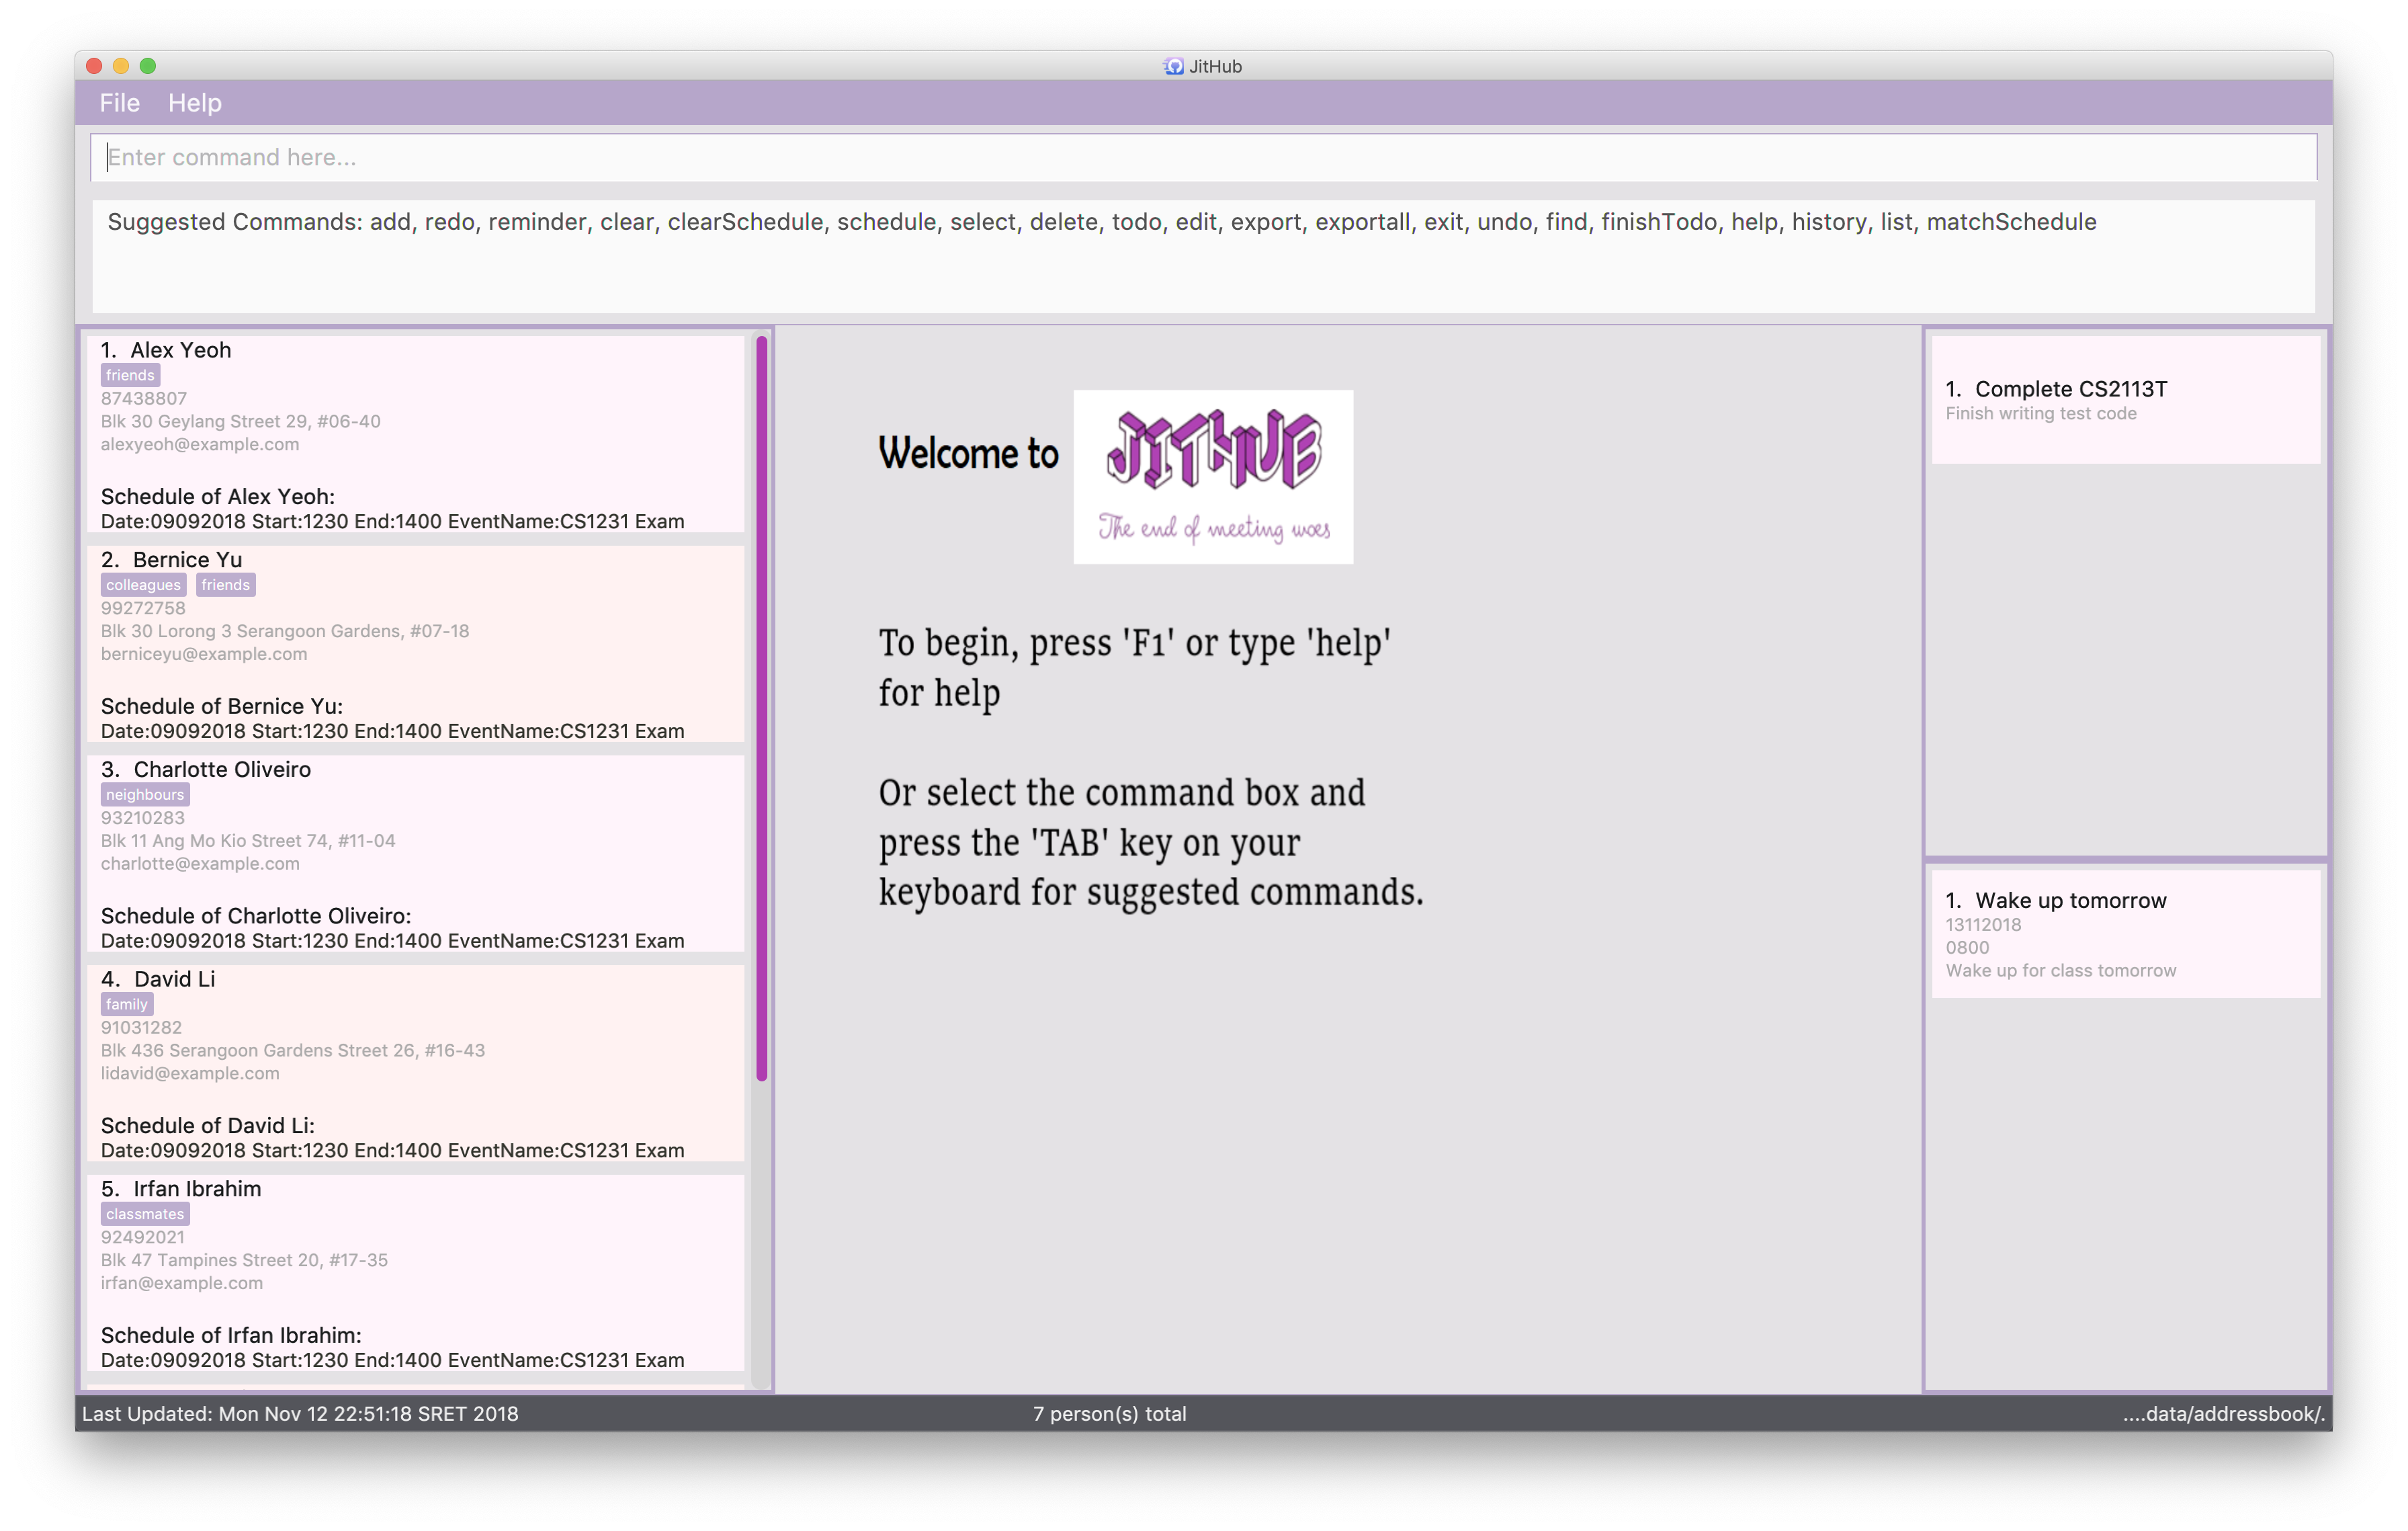
JitHub is for students who prefer to use a desktop app for managing contacts, email, and calendar. More importantly, JitHub is optimized for those who prefer to work with a Command Line Interface (CLI) while still having the benefits of a Graphical User Interface (GUI). If you can type fast, JitHub can get your daily tasks such as checking schedule done faster than traditional GUI apps. Interested? Jump to the Section 2, “Quick Start” to get started. Enjoy!
2. Quick Start
-
Ensure you have Java version
9or later installed in your Computer. -
Download the latest
jithub.jarhere. -
Copy the file to the folder you want to use as the home folder for your JitHub.
-
Double-click the file to start the app. The GUI should appear in a few seconds.
-
Type the command in the command box and press Enter to execute it.
e.g. typinghelporhand pressing Enter will open the help window. -
Some example commands you can try:
-
list: lists all contacts -
addn/John Doe p/98765432 e/johnd@example.com a/John street, block 123, #01-01: adds a contact namedJohn Doeto the Address Book. -
delete3: deletes the 3rd contact shown in the current list -
exit: exits the app -
h: access the help document
-
-
Refer to Section 3, “Features” for details of each command.
3. Features
Command Format
-
Words in
UPPER_CASEare the parameters to be supplied by the user e.g. inadd n/NAME,NAMEis a parameter which can be used asadd n/John Doe. -
Items in square brackets are optional e.g
n/NAME [t/TAG]can be used asn/John Doe t/friendor asn/John Doe. -
Items with
… after them can be used multiple times including zero times e.g.[t/TAG]…can be used ast/friend,t/friend t/familyetc. -
Parameters can be in any order e.g. if the command specifies
n/NAME p/PHONE_NUMBER,p/PHONE_NUMBER n/NAMEis also acceptable.
3.1. Viewing help : help / h
Format: help
3.2. Adding a person: add / a
Adds a person to the address book
Format: add n/NAME p/PHONE_NUMBER e/EMAIL a/ADDRESS [t/TAG]…
| A person can have any number of tags (including 0) |
Examples:
-
add n/John Doe p/98765432 e/johnd@example.com a/John street, block 123, #01-01 -
add n/Betsy Crowe t/friend e/betsycrowe@example.com a/Newgate Prison p/1234567 t/criminal
3.3. Listing all persons : list / ls
Shows a list of all persons in the address book.
Format: list
3.4. Editing a person : edit / e
Edits an existing person in the address book.
Format: edit INDEX [n/NAME] [p/PHONE] [e/EMAIL] [a/ADDRESS] [t/TAG]…
Examples:
-
edit 1 p/91234567 e/johndoe@example.com
Edits the phone number and email address of the 1st person to be91234567andjohndoe@example.comrespectively. -
edit 2 n/Betsy Crower t/
Edits the name of the 2nd person to beBetsy Crowerand clears all existing tags.
3.5. Locating persons by name: find / f
Finds persons whose names contain any of the given keywords.
Format: find KEYWORD [MORE_KEYWORDS]
Examples:
-
find John
ReturnsjohnandJohn Doe -
find Betsy Tim John
Returns any person having namesBetsy,Tim, orJohn
3.6. Deleting a person : delete / d
Deletes the specified person from the address book.
Format: delete INDEX
Examples:
-
list
delete 2
Deletes the 2nd person in the address book. -
find Betsy
delete 1
Deletes the 1st person in the results of thefindcommand.
3.7. Selecting a person : select / s
Selects the person identified by the index number used in the displayed person list.
Format: select INDEX
Examples:
-
list
select 2
Selects the 2nd person in the address book. -
find Betsy
select 1
Selects the 1st person in the results of thefindcommand.
Upon selecting a person, the calendar of the current month will be displayed, instead of the
welcome message.
For additional calendar features, please view calendar to view schedule.
3.8. Listing entered commands : history / hs
Lists all the commands that you have entered in reverse chronological order.
Format: history
|
Pressing the ↑ and ↓ arrows will display the previous and next input respectively in the command box. |
3.9. Undoing previous command : undo / z
Restores the address book to the state before the previous undoable command was executed.
Format: undo
|
Undoable commands: those commands that modify the address book’s content ( |
Examples:
-
delete 1
list
undo(reverses thedelete 1command) -
select 1
list
undo
Theundocommand fails as there are no undoable commands executed previously. -
delete 1
clear
undo(reverses theclearcommand)
undo(reverses thedelete 1command)
3.10. Redoing the previously undone command : redo / y
Reverses the most recent undo command.
Format: redo
Examples:
-
delete 1
undo(reverses thedelete 1command)
redo(reapplies thedelete 1command) -
delete 1
redo
Theredocommand fails as there are noundocommands executed previously. -
delete 1
clear
undo(reverses theclearcommand)
undo(reverses thedelete 1command)
redo(reapplies thedelete 1command)
redo(reapplies theclearcommand)
3.12. Searching for person’s photograph
Searches for the person’s photograph on Google.
-
Person must have an online presence eg. Facebook/LinkedIn for the search to work.
Format:
-
The selected person will be searched on google. Refer to
selecton how to select a person.
3.13. Export contacts displayed: export
You can save the hassle of your group mates typing in the exact same contact details of your group members if you have already save them into your JitHub.
To do so, simply find the person(s) and export the contact details in JitHub to a
file and share it with your group mates.
Format: export FILENAME.xml
Examples:
-
find Alex -
export alex.xml
|
|
Your team members can import the contact details to their JitHub. Please refer to Section 3.15, “Import contacts: |
3.14. Exporting all contacts : exportall
Export the name, phone, address and email of all persons in the addressbook under the specified filetype.
Format: exportall FILETYPE
Examples:
-
exportall csv -
exportall vcf[coming in v2.0]
|
3.15. Import contacts: import
You can save the hassle of typing in the exact same contact details of your group members if one of your group members have already save them into his/her JitHub.
To do so, politely ask them to export the contact details and place the file your teammate exported into the
/data/ of your JitHub
and import it into your JitHub.
Format: import FILENAME.xml
Examples:
-
import alex.xml
|
|
You can refer to Section 3.13, “Export contacts displayed: |
3.16. Add personal schedule : schedule / sc
This function enables you to add the scheduled events of a person into the selected person’s card.
Format: schedule INDEX-OF-PERSON d/DATE(DDMMYYYY) st/START-TIME et/END_TIME en/EVENT-NAME
Examples:
-
schedule 1 d/09092018 st/1200 et/1400 en/CS1231 Exam -
schedule 2 d/08072018 st/1000 et/1900 en/CS2040C Practical Exam
Currently, the adding of scheduled events allows for events of the same name to be added, at the same time slot. This issue will be fixed in V2.0.
3.17. Clear personal weekly schedule : clearSchedule / cs
Format:
clearSchedule IndexOfPerson
Examples:
-
clearSchedule 1
3.18. List Common Schedule : matchSchedule / ms
Shows a list of common meeting time for a group of contacts and the user in that given that given period of time.
Format: matchSchedule d/SELECTED-DATE st/START-TIME et/END-TIME i/INDEX-OF-PERSON…[INDEX]
Examples:
-
matchSchedule d/01012018 st/0800 et/1800 i/1 i/2 i/3
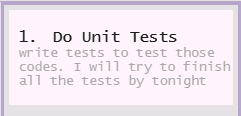
3.19. Add To-do task: todo
Adds a to-do task, the to-do list panel will display the task’s title and its content.
Format: todo tt/TITLE c/CONTENT
Examples:
-
todo tt/Write tests c/Need to write test for this command -
todo tt/Buy grocery c/Buy tomato and potato on the way back home
The following diagram illustrates how the todo is being used on the JitHub CLI-GUI app:

3.20. Finish To-do task: finishTodo
Complete a to-do task, and the to-do list panel will re-render the remaining unfinished to-do tasks.
Format: finishTodo INDEX
Examples:
-
finishTodo 1
|
The following diagram illustrates how the finishTodo is being used on the JitHub CLI-GUI app:

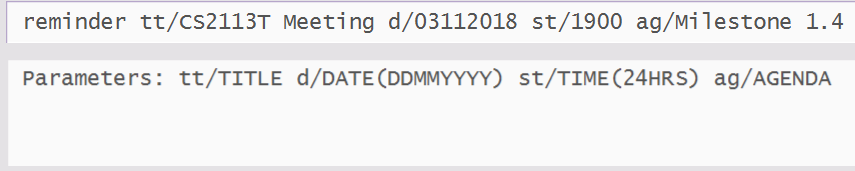
3.21. Add Reminder: reminder
Adds a reminder for your next meeting, containing details like the title, date, time and agenda of the meeting.
Format: reminder tt/TITLE d/DATE(DDMMYYYY) st/START_TIME ag/AGENDA
|
Reminders with the same |
Examples:
-
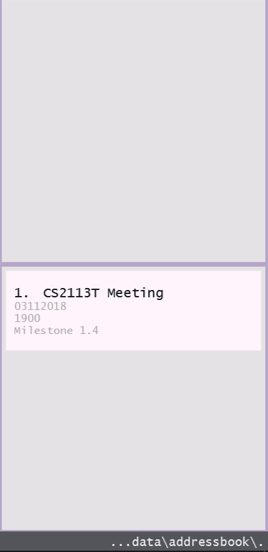
reminder tt/CS2113T Meeting d/03112018 st/1900 ag/Milestone 1.4 -
The following sequence of images illustrate how the example
ReminderCommandis executed in JitHub.-
Step 1: User inputs command in Jithub’s command box.
-
-
Step 2: On successful addition, the results box will display this message.

-
Step 3: The newly added
Reminderwill be displayed on theReminderpane of theUIsidebar, below theTodopane.
3.23. Saving the data
JitHub data are saved in the hard disk automatically after any command that changes the data.
There is no need to save manually.
The storage file 'jithub.xml' is located in the project root folder.
3.24. Getting Smart Suggestions
Receive smart suggestions while typing in your commands. Press the TAB key while typing a command halfway to get
suggestions on possible commands without having to navigate to the help window. If only one command is available,
pressing TAB will auto-complete the command for you without the need to type it in manually.
This is particularly helpful when you are new to the commands and require time to get used to it. Pressing TAB would
show all helpful and useful information needed, and this would definitely benefit you as the learning curve to using our
application would not be steep.
Examples:
-
While typing
histo gethistorycommand, pressTAB. Thehistorycommand will automatically be filled in for you as it is the only suggestion available. The command parameters would then be shown as a prompt to help you with your input. -
While typing
e, pressTAB. The system will suggest to you all possible commands that start withe, which would beexportall,export,exit, andedit.
3.25. Getting Wrong Command Suggestions
Should you type in a wrong command, fear not, as our system will automatically suggest to you what you have typed wrongly, by giving you a closest approximation of word through the message box after you press enter.
The input is not case sensitive when looking for suggestions, hence it would increase the chance of getting a closer approximation of your desired command!
This is particularly useful when you are typing very quickly, as sometimes you might make minor mistakes which can be easily correctable from our application.
Examples:
-
If you wanted to type
selectbut you typedsalectinstead, the system will tell you that it is an invalid command, and would suggest to you the commandselectinstead.
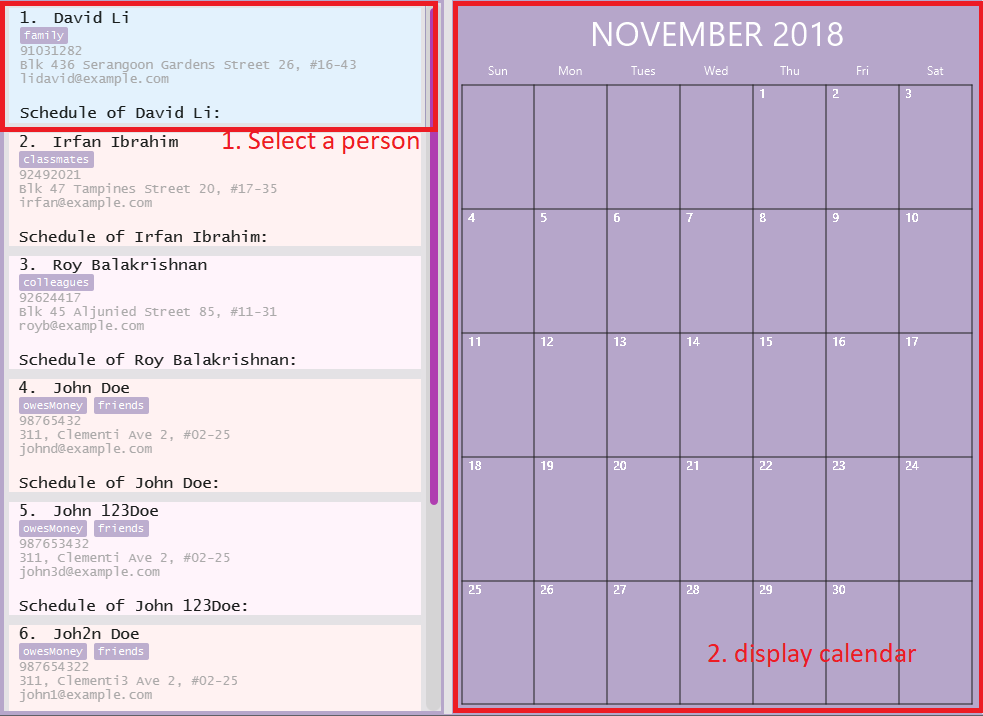
3.26. Monthly Calendar View
Once you start running the application and select a person from the person list panel, the calendar of the current month will be displayed on the calendar panel.
The following diagram shows how the calendar looks like for November 2018.
3.27. Calendar to view schedule [Coming in V2.0]
When selecting a person, the scheduled events are to be displayed on the calendar panel.
Command type: select INDEX
When matching schedules, the common time slots found are to be displayed on the calendar panel.
Command type: matchSchedule d/SELECTED-DATE st/START-TIME et/END-TIME i/INDEX-OF-PERSON…[INDEX]
3.28. Encryption [Coming in V2.0]
When exporting contacts for the purpose of information transfer to another computer, encryption can be enabled before the export command to prevent data misuse.
Command type: encrypt for export
4. FAQ
Q: How do I transfer my data to another Computer?
A: Install the app in the other computer and overwrite the empty data file it creates with the file that contains the
data of your previous JitHub folder.
Q: How do I export my contacts to my phone?
A: Use the exportall command to generate a csv file and transfer that file to your phone. Use your phone contacts
app to import that file.
5. Command Summary
-
Add
add n/NAME p/PHONE_NUMBER e/EMAIL a/ADDRESS [t/TAG]…
e.g.add n/James Ho p/22224444 e/jamesho@example.com a/123, Clementi Rd, 1234665 t/friend t/colleague -
Clear :
clear -
Delete :
delete INDEX
e.g.delete 3 -
Edit :
edit INDEX [n/NAME] [p/PHONE_NUMBER] [e/EMAIL] [a/ADDRESS] [t/TAG]…
e.g.edit 2 n/James Lee e/jameslee@example.com -
Find :
find KEYWORD [MORE_KEYWORDS]
e.g.find James Jake -
List :
list -
Help :
help -
Select :
select INDEX
e.g.select 2 -
History :
history -
Undo :
undo -
Redo :
redo -
Export :
export FILENAME.xml -
Import :
import FILENAME.xml -
ExportAll :
exportall FILETYPE
e.g.exportall csv -
Mail :
mail [i/INDEX](to be added) -
Todo :
todo tt/TITLE c/CONTENT -
Reminder :
reminder tt/TITLE d/DATE(DDMMYYYY) st/START_TIME ag/AGENDA -
FinishTodo :
finishTodo INDEX -
Schedule :
schedule INDEX-OF-PERSON d/DATE(DDMMYYYY) st/START-TIME et/END_TIME en/EVENT-NAME -
Clear Schedule :
clearSchedule IndexOfPerson -
Match Schedule :
matchSchedule d/SELECTED-DATE st/START-TIME et/END-TIME i/INDEX-OF-PERSON…[INDEX] -
Mail :
mail [i/INDEX]